Creating Your First Form
On this page, we're going to go over the steps to building your first form. Forms can be as simple or complex as you choose to make them. There are heaps of options and customizations available. We'll keep this example as simple as possible to make things easier. You can find more in-depth details on other features and customizations from the other help pages.
1. To get started, navigate to your forms page by clicking "Forms" in the left sidebar.
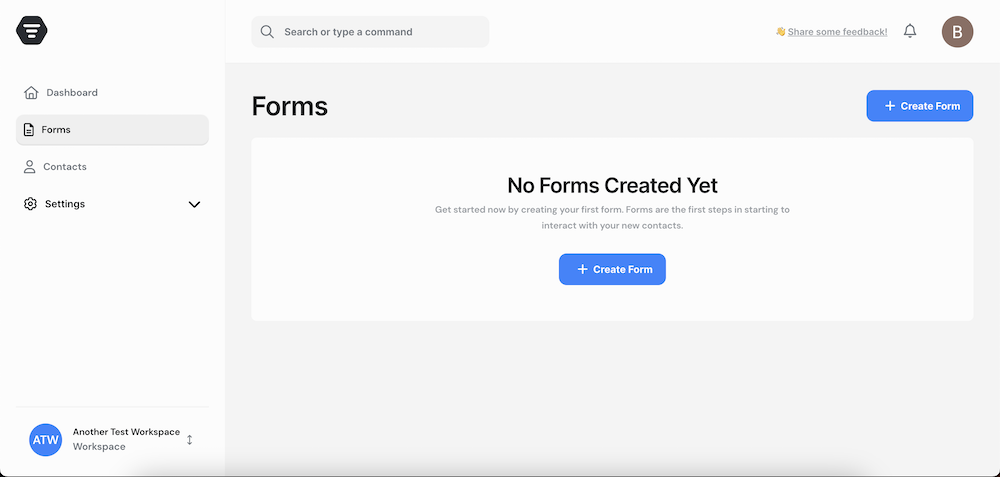
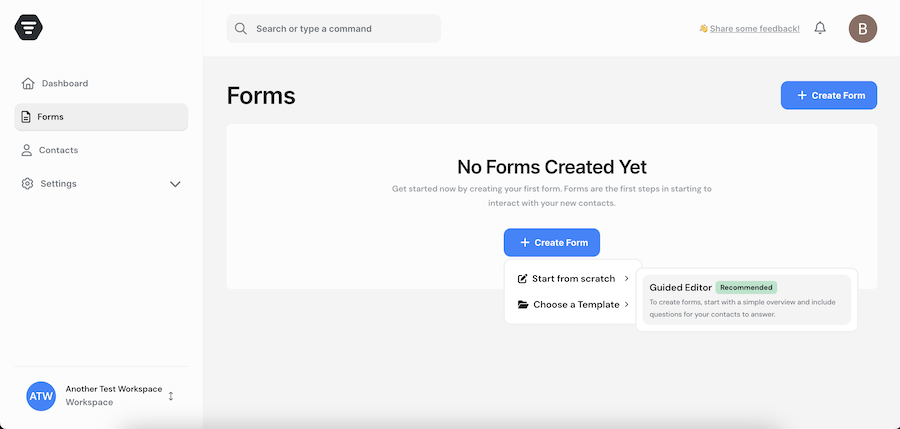
2. Since you do not have any forms yet, you'll see a blank page prompting you to create a form. Click on "+ Create Form". This will open a dropdown menu. From here, click on "Guided Editor". You can also choose a template, which will autofill some key form details for you. For now, though, let's stick with the Guided Editor.
3. After clicking on "Guided Editor," FormSuite will create a new form for you and then redirect you to the form editor. This is where you can make all changes to your form.
On the left side, you'll see the editor sidebar. This section includes:
- Global Settings Button: Clicking on the gear icon will open a modal with some global settings like font size, font family, colors, and more.
- A list of all your journey items: By default, there will be just one, which will be a welcome screen.
- The Overview Section: This is a textarea where you can enter the purpose of the form. I'll touch more on this shortly.
- The Tone of Voice Section: Here, you can change the personality behind the form's AI assistant. Again, I'll touch more on this shortly.
- The About Section: This is where you can provide details about yourself or your company.
- The Train Your AI Section: I'll touch on this shortly as well. In short, this is where you can provide a list of informational snippets for you form's AI assistant.
- Publish Changes Button: This is pretty self-explanatory, but it's how you publish your changes. Any change you make is automatically saved as a draft, so you need to publish your changes for the public to see them.
On the right side, you'll find the journey item editor. This is where you can edit the current step of your form. There are three tabs in this section: Content, Design, and Logic. We'll touch more on these sections in some other documentation pages.
Lastly, in the center, is the browser preview of your form. Here you can see and interact with your form as you edit it. Clicking on "Share" will also open a modal that provides some sharing options like a shareable link, embedded code snippets, pop-up script options, and more.

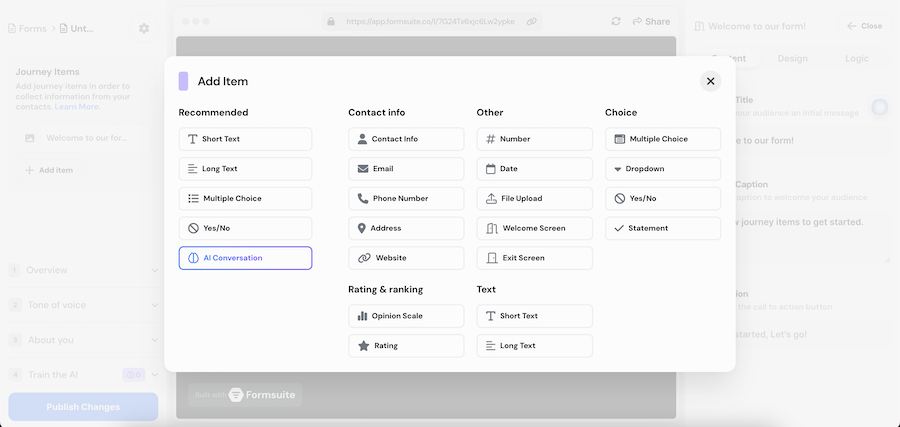
4. Now that you have a basic understanding of the editor screen, let's add another journey item. Journey items are essentially the steps of your form, which you can think of as questions or blocks. When the form is filled out by a user, it will display these steps sequentially in the order you set in the editor. You can drag and reorder them as needed.
To add a new journey item, click on the "+ Add Item" button. This will open a modal with a list of journey item types. Each journey item has a type, such as email, phone number, contact details, AI conversation, rating, and more. Click on whichever type of information you'd like to collect.
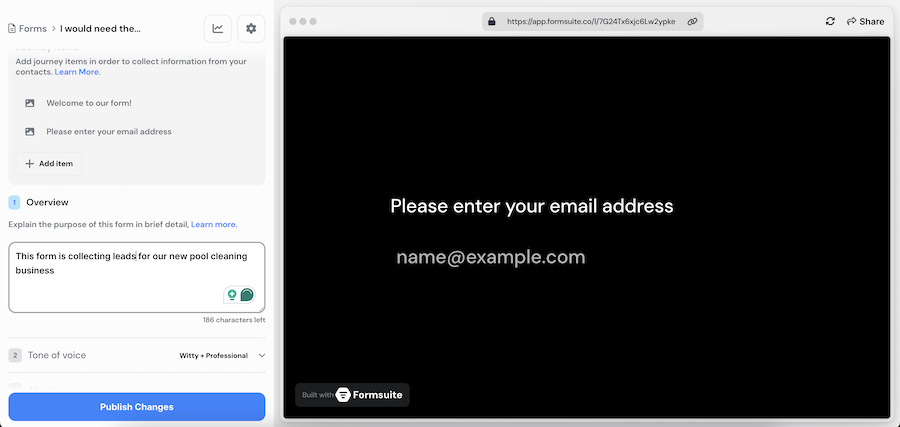
5. Now that we have a new journey item, let's make some changes to it. After clicking on an item type (I chose "Email"), you'll see the new journey item in your list of steps on the left side, and some new fields you can edit on the right side will appear. You can switch between journey items by clicking on them in the left sidebar.
To change the content of the new step, enter new values in the fields on the right. For example, I updated the "Title" field to say "Please enter your email address". As you make changes, you'll see your updated values in real time in the browser preview window (center section).

6. Once you're happy with your changes, try to hit "Publish Changes." You'll notice there was no notification indicating that your changes were published. Additionally, next to Overview and About in the left sidebar, you'll see some alert icons. These indicate validation errors in the form. The reason these are showing is because all forms must have an Overview and About description. These descriptions are very important as your form's AI assistant uses them when organizing and summarizing the quality of your contacts. I'll touch more on form AI assistants on another page.

So let's add those details in. Click on "Overview" first. This will open the overview section. Enter the purpose of your form here. You also can do the same for "About".
Once you've filled out these details you can try and click "Publish Changes" again.
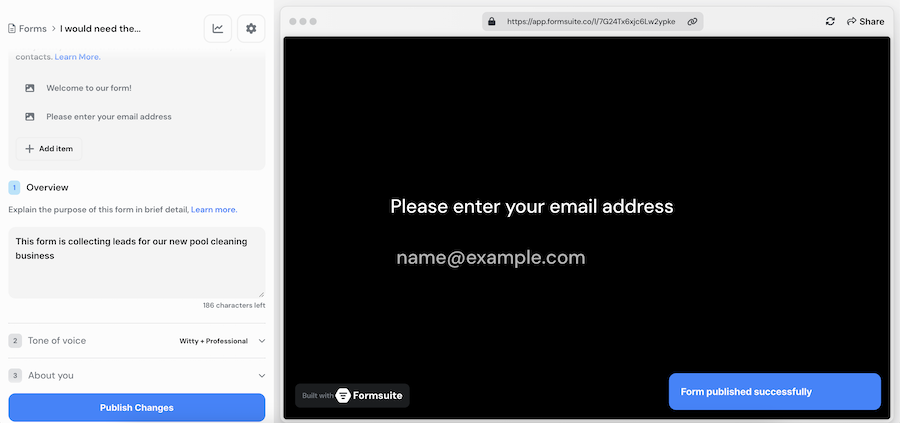
Now you'll see the "Form published successfully" message.
You did it! You created your first form!
Hopefully, this helps make sense of the basics of the editor. You may also have more questions than when you started. If that is the case, please check out the rest of the help documentation for more details on each section.